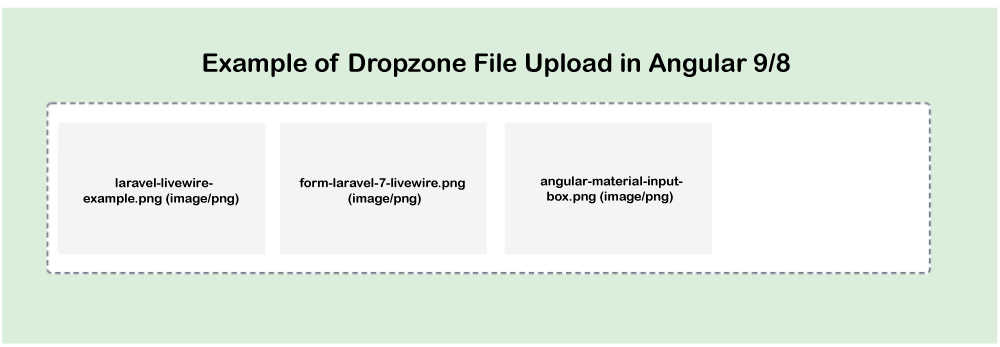
In this section, we are going to learn how to upload an image using dropzone in Angular 9 or angular 8. We will also see image upload using drag and drop. In our example, we will use ngx dropzone in angular 9/8.
In our angular 9 application, we will use components of dropzone to upload multiple images simply. In order to do drag and drop image uploading, we are going to use a package of ngx-dropzone npm. In the below application, we will upload the images using the dropzone js. We will also use php to create web services. We can use API to upload one or more than one image or file on the serve0072. The step by step process to upload image is as follows:
Step 1:
In this step, we will Create New App. For this, we will use the following command to create our angular app.
ng new my-dropzone-appStep 2:
In the second step, we are going to Install ngx-dropsone package. In our example, we need angular js in angular. For this, we require to install the package of ngx-dropzone. The following command will be run to install it:
npm install --save ngx-dropzone Step 3:
In the third step, we will Import module. In our below example, we will use the app.module.ts file, and then we will import the two modules for this file, i.e., NgxDropzone Module and HttpClientModule. We will import both by using the following code:
import { BrowserModule } from '@angular/platform-browser';

import { NgModule } from '@angular/core';


import { AppComponent } from './app.component';


import { HttpClientModule } from '@angular/common/http';

import { NgxDropzoneModule } from 'ngx-dropzone';


@NgModule({

  declarations: [

    AppComponent

  ],

  imports: [

    BrowserModule,

    HttpClientModule,

    NgxDropzoneModule

  ],

  providers: [],

  bootstrap: [AppComponent]

})

export class AppModule { }
Step 4:
In this step, we will Update View File. In order to update, we will use our html file. We will use our view file and simply create the component of the dropzone. For this, we will put the code, which is described as follows:
src/app/app.component.html:
<h1> Example of Dropzone File Upload in Angular 9/8 </h1>


<ngx-dropzone (change)="onSelect($event)">

  <ngx-dropzone-label>Drop it, baby!</ngx-dropzone-label>

  <ngx-dropzone-preview *ngFor="let f of files" [removable]="true" (removed)="onRemove(f)">

    <ngx-dropzone-label>{{ f.name }} ({{ f.type }})</ngx-dropzone-label>

  </ngx-dropzone-preview>

</ngx-dropzone>
Step 5:
In this step, we will Use Component ts file. We will use HttpClient and update a file named component.ts. After that, we will select the image by writing method. For this, we will use the url of our local api file that is ‘http://localhost:8001/upload.php’. So we will update the following code.
src/app/app.component.ts:
import { Component } from '@angular/core';

import { HttpClient } from '@angular/common/http';


@Component({

  selector: 'app-root',

  templateUrl: './app.component.html',

  styleUrls: ['./app.component.css']

})

export class AppComponent {

    title = 'dropzone';


    files: File[] = [];


    constructor(private http: HttpClient) { }


    onSelect(event) {

        console.log(event);

        this.files.push(...event.addedFiles);


        const formData = new FormData();


        for (var i = 0; i < this.files.length; i++) {

          formData.append("file[]", this.files[i]);

        }


        this.http.post('http://localhost:8001/upload.php', formData)

        .subscribe(res => {

           console.log(res);

           alert('Uploaded Successfully.');

        })

    }


    onRemove(event) {

        console.log(event);

        this.files.splice(this.files.indexOf(event), 1);

    }

}
Now our above example is ready to run. We will use PHP so that we can create api file. In our example, we will use the upload folder to create an update.php file. After that, we will run it by using a different port and call it. The below command is used to create an upload.php file.
upload.php:
<?php


header("Access-Control-Allow-Origin: *");

header("Access-Control-Allow-Methods: PUT, GET, POST");

header("Access-Control-Allow-Headers: Origin, X-Requested-With, Content-Type, Accept");


$folderPath = "upload/";

$postdata = file_get_contents("php://input");

$request = json_decode($postdata);


foreach ($request->fileSource as $key => $value) {


    $image_parts = explode(";base64,", $value);


    $image_type_aux = explode("image/", $image_parts[0]);


    $image_type = $image_type_aux[1];


    $image_base64 = base64_decode($image_parts[1]);


    $file = $folderPath . uniqid() . '.'.$image_type;


    file_put_contents($file, $image_base64);

}
Now our both code is ready to run. We can run it by using the following command on our angular app.
ng serve After that, we will run PHP API like this:
php -S localhost:8001 When we run this api, we will get the following output:

Leave a Reply